貧者の赤道儀 (The Poor Man's Equatorial) - (2-g) NASAのMontage、その効果
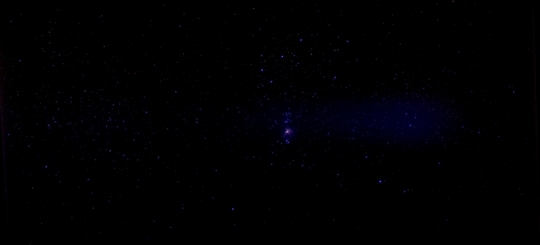
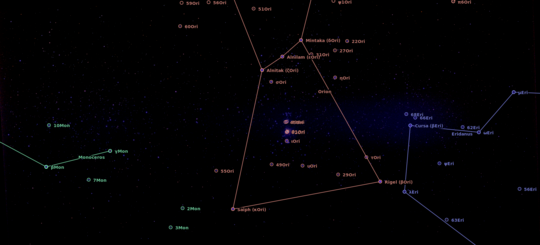
重ねるほどにノイズが減ります。εOri付近、mViewにお任せなので、トーン拡張の条件はそれぞれ異なる。
mViewer -ct 1 -gray B_Uncorrected_Crop.fits -1s max gaussian-log -out B_Uncorrected_Crop.png
出来たパノラマがこちら。
貧者の赤道儀 (The Poor Man's Equatorial) - (2-f) NASAのMontage
solve-fieldした後、Gチャネルの結果を他のチャネルに上書きして処理してみた。ズレは無くなるはずだ。
#!/usr/bin/bash
for d in B G R; do cd ${d}; for f in *.tif; do solve-field ${f} --scale-low 5 --scale-high 15 -p -N `basename ${f} .tif`.fits --overwrite; done; cd ..; done
for d in B R; do cd ${d}; for f in *.fits; do mGetHdr ../G/${f} temp.hdr; mPutHdr ${f} ./temp ./temp.hdr; mv temp ${f}; rm temp.hdr; done; cd ..; done
for d in B G R; do mImgtbl ${d} ${d}Images.tbl; done
for d in B G R; do mMakeHdr ${d}Images.tbl ${d}Template.hdr; done
for d in B G R; do mkdir ${d}Proj; mProjExec -p ${d} ${d}Images.tbl ${d}Template.hdr ${d}Proj ${d}Stats.tbl; done
for d in B G R; do mImgtbl ${d}Proj ${d}Proj.tbl; done
for d in B G R; do mAdd -p ${d}Proj ${d}Proj.tbl ${d}Template.hdr ${d}Uncorrected.fits; done
for d in B G R; do mImgtbl ${d}Proj ${d}ProjImages.tbl; done
for d in B G R; do mOverlaps ${d}ProjImages.tbl ${d}Diffs.tbl; done
for d in B G R; do mkdir ${d}Diff; mDiffExec -p ${d}Proj ${d}Diffs.tbl ${d}Template.hdr ${d}Diff; done
for d in B G R; do mFitExec ${d}Diffs.tbl ${d}FITS.tbl ${d}Diff; done
for d in B G R; do mBgModel ${d}ProjImages.tbl ${d}FITS.tbl ${d}Corrections.tbl; done
for d in B G R; do mkdir ${d}Cor; mBgExec -p ${d}Proj ${d}ProjImages.tbl ${d}Corrections.tbl ${d}Cor; done
for d in B G R; do mAdd -p ${d}Cor ${d}ProjImages.tbl ${d}Template.hdr ${d}Corrected.fits; done
for d in B G R; do mViewer -ct 1 -gray ${d}Corrected.fits -1s max gaussian-log -out ${d}Corrected.png; done
ズレは無いな、確かに。背景が少し残ってます。つうか、インターバロメータで撮った星の写真を合わせこむから貧者の赤道儀などと言ってたわけだが、これでは単にsky panoramaだな。手持ちでも三脚でも星さえ写ってりゃパノラマにできちゃうんだから。
貧者の赤道儀 (The Poor Man's Equatorial) - (2-e) NASAのMontage
NASAのMontageというツールセットでパノラマを作ってみるテスト。そもそもsky panorama専用の道具なのでうまく行くはず、と期待している。
最終的にカラー画像が欲しいので、各チャンネル別のディレクトリに保存してそれぞれ処理してみた。
$ for d in B G R; do cd ${d}; for f in *.tif; do solve-field ${f} --scale-low 5 --scale-high 15 -p -N `basename ${f} .tif`.fits; done; cd ..; done

Reading input file 1 of 1: "DSC_3051.tif"...
TIFFReadDirectory: Warning, Unknown field with tag 36867 (0x9003) encountered.
tifftopnm: writing PPM file
Read file stdin: 2006 x 3009 pixels x 1 color(s); maxval 65535
Using 16-bit output
Extracting sources...
simplexy: found 524 sources.
Solving...
Reading file "./DSC_3051.axy"...
...snip...

$ for d in B G R; do mImgtbl ${d} ${d}Images.tbl; done

[struct stat="OK", count=11, badfits=0, badwcs=0]
[struct stat="OK", count=11, badfits=0, badwcs=0]
[struct stat="OK", count=11, badfits=0, badwcs=0]

$ for d in B G R; do mMakeHdr ${d}Images.tbl ${d}Template.hdr; done

[struct stat="OK", msg="Cube columns exist but are either blank or inconsistent. Outputting 2D only.", count=11, ncube=0, naxis1=7021, naxis2=3207, clon=84.454153, clat=-4.901913, lonsize=29.788476, latsize=13.606558, posang=0.720450, lon1=99.296909, lat1=-11.114580, lon2=69.765612, lat2=-11.480492, lon3=69.889981, lat3=1.630289, lon4=98.851270, lat4=1.989290]
[struct stat="OK", msg="Cube columns exist but are either blank or inconsistent. Outputting 2D only.", count=11, ncube=0, naxis1=7021, naxis2=3207, clon=84.454143, clat=-4.902138, lonsize=29.789432, latsize=13.606994, posang=0.721378, lon1=99.297465, lat1=-11.114740, lon2=69.765237, lat2=-11.481135, lon3=69.889425, lat3=1.630038, lon4=98.851585, lat4=1.989512]
[struct stat="OK", msg="Cube columns exist but are either blank or inconsistent. Outputting 2D only.", count=11, ncube=0, naxis1=7021, naxis2=3208, clon=84.454052, clat=-4.902060, lonsize=29.788384, latsize=13.610759, posang=0.721674, lon1=99.296969, lat1=-11.116418, lon2=69.765662, lat2=-11.482952, lon3=69.889804, lat3=1.631847, lon4=98.850912, lat4=1.991456]

$ for d in B G R; do mkdir ${d}Proj; mProjExec -p ${d} ${d}Images.tbl ${d}Template.hdr ${d}Proj ${d}Stats.tbl; done

[struct stat="OK", count=11, failed=0, nooverlap=0]
[struct stat="OK", count=11, failed=0, nooverlap=0]
[struct stat="OK", count=11, failed=0, nooverlap=0]

$ for d in B G R; do mImgtbl ${d}Proj ${d}Proj.tbl; done
[struct stat="OK", count=11, badfits=0, badwcs=0]
[struct stat="OK", count=11, badfits=0, badwcs=0]
[struct stat="OK", count=11, badfits=0, badwcs=0]

$ for d in B G R; do mAdd -p ${d}Proj ${d}Proj.tbl ${d}Template.hdr ${d}Uncorrected.fits; done
[struct stat="OK", time=2]
[struct stat="OK", time=2]
[struct stat="OK", time=1]
ここまででバックグラウンド補正無しのパノラマの完成。
$ for d in B G R; do mImgtbl ${d}Proj ${d}ProjImages.tbl; done
[struct stat="OK", count=11, badfits=0, badwcs=0]
[struct stat="OK", count=11, badfits=0, badwcs=0]
[struct stat="OK", count=11, badfits=0, badwcs=0]

$ for d in B G R; do mOverlaps ${d}ProjImages.tbl ${d}Diffs.tbl; done
[struct stat="OK", count=34]
[struct stat="OK", count=34]
[struct stat="OK", count=34]

$ for d in B G R; do mDiffExec -p ${d}Proj ${d}Diffs.tbl ${d}Template.hdr ${d}Diff; done
[struct stat="OK", count=34, failed=0]
[struct stat="OK", count=34, failed=0]
[struct stat="OK", count=34, failed=0]

$ for d in B G R; do mFitExec ${d}Diffs.tbl ${d}FITS.tbl ${d}Diff; done
[struct stat="OK", count=34, failed=0, warning=0, missing=0]
[struct stat="OK", count=34, failed=0, warning=0, missing=0]
[struct stat="OK", count=34, failed=0, warning=0, missing=0]

$ for d in B G R; do mBgModel ${d}ProjImages.tbl ${d}FITS.tbl ${d}Corrections.tbl; done
[struct stat="OK"]
[struct stat="OK"]
[struct stat="OK"]

$ for d in B G R; do mBgExec -p ${d}Proj ${d}ProjImages.tbl ${d}Corrections.tbl ${d}Cor; done
[struct stat="OK", count=11, nocorrection=0, failed=0]
[struct stat="OK", count=11, nocorrection=0, failed=0]
[struct stat="OK", count=11, nocorrection=0, failed=0]

$ for d in B G R; do mAdd -p ${d}Cor ${d}ProjImages.tbl ${d}Template.hdr ${d}Corrected.fits; done
[struct stat="OK", time=2]
[struct stat="OK", time=1]
[struct stat="OK", time=2]

$ for d in B G R; do mViewer -ct 1 -gray ${d}Corrected.fits -1s max gaussian-log -out ${d}Corrected.png; done
[struct stat="OK", min=10710.8, minpercent=22.48, minsigma=-1.00, max=65621.3, maxpercent=100.00, maxsigma=37.91, datamin=6901.62, datamax=65621.3, xflip=0, yflip=1, bunit="", colortable=1]
[struct stat="OK", min=34240.8, minpercent=22.33, minsigma=-1.00, max=66045.4, maxpercent=100.00, maxsigma=16.32, datamin=28203.3, datamax=66045.4, xflip=0, yflip=1, bunit="", colortable=1]
[struct stat="OK", min=19943.6, minpercent=22.44, minsigma=-1.00, max=65717, maxpercent=100.00, maxsigma=31.24, datamin=15654.9, datamax=65717, xflip=0, yflip=1, bunit="", colortable=1]
ここで、BG補正が終わる。出来たFITSからビットマップに変換して合成したがうまく行かない。各チャンネルのsolve-fieldの結果が微妙にズレているのが原因。
貧者の赤道儀 (The Poor Man's Equatorial) - (2-d) CIAOのreproject_image
先日のreproject_imageとかreproject_image_gridとかを試した際、出力される画像がこちらの思うような平均画像ではなかった件、ちょっと見てみた。
単純に画像の平均を考える際、同じ大きさ、オフセット無しであれば、入力それぞれの画素を足しあわせて枚数で割れば良い。一方、reproject_imageの場合、reprojectつうくらいなんで、
- 入力の画素を全てWCSへ座標変換して記憶しておく
- 取得すべきWCS座標をスキャンする
- スキャンするWCS座標上の画素にどの入力画像が該当するのかサーチする
- 該当する入力画像の画素値を足し合わせる
- 画素数で割る
という感じだろうと思いつつ、ソースを眺めると、途中までは良いんだが、最後、画素数じゃなくて、面積で割り算しとる。うーん、ばかばか、そうじゃないの。X線望遠鏡だから線量とかFluxなのでそうなっちゃうんだろう。こちとら露出つうかExposureだかんね、面積で割られるのは心外なわけだわ。どうすっかなあ、reproject_image改造するか、別の手を考えるか。あとね、リサンプリングも雑だわ。縦横プラマイ0.5単位でサーチしとるだけ。Poisson-Disk Resamplingとかそういうの欲しいわあ。
貧者の赤道儀 (The Poor Man's Equatorial) - (2-c) CIAOで整列、検証
NASAはチャンドラX線観測衛星つうのを運営しておって、衛星のデータ解析のためにCIAOというツールを公開している。これに使えそうなコマンドが有るので試してみる。
CIAOのインストール*1
検証
早速検証してみる。使うのは、reproject_image_gridつうコマンド。solve-fieldすると元のイメージを含むFITSファイルができているはず、これを入力にして、WCS座標もろもろをパラメータにする。img.listには入力にするFITSファイルが羅列してある。
$ reproject_image_grid infile=@img.list outfile=reproject.fits xcenter=84.516787 ycenter=-4.669385 xsize=6692 ysize=2841 method=average pixelsize=15.3291\" theta=0 clobber=yes
綺麗に重ねられてます。さすが超ガチの学術研究用だは。しかしよお、averageつってんのに、これは違うよね。どうなってんでしょ、も少し調べてみよう。
貧者の赤道儀 (The Poor Man's Equatorial) - (2-a) 視点の算出からテスト書き出し
フィールドソルバ(solve-field)の動作確認
以前記事にした、
を別のアプローチでやってみようかなと。前回は、1. 撮影した赤緯などをおおよそ求め、2. Huginで複数枚を重ねあわせ、3. 画角などを追い込んでいく、という方法だった。
今回は、solve-fieldというコマンドを利用して、赤緯、画角などを、撮像枚数分正確に求め、それを元に重ね合わせが出来ないか検証する。
solve-fieldは、Astrometry.netが元のツールで、その分野ではフィールドソルバーと呼ばれるもの。写真から星らしきものを自動抽出し、恒星位置カタログと比較してくれる。ubuntuにはパッケージがあるので、インストールは簡単。本体とカタログの両方が必要。
$ sudo apt-get install astronomy.net astro-catalogs
"catalogs"のスペルが気に入らないが、ヤンキーなのでしょうがない。とまれ、コマンド一発で赤経(RA)、赤緯(Dec)に加えて画角が手に入る。
$ solve-field --overwrite DSC_3550.tif
Reading input file 1 of 1: "DSC_3550.tif"...
TIFFReadDirectory: Warning, Unknown field with tag 36867 (0x9003) encountered.
tifftopnm: writing PPM file
Read file stdin: 2006 x 3009 pixels x 1 color(s); maxval 65535
Using 16-bit output
Extracting sources...
simplexy: found 479 sources.
Solving...
Reading file "./DSC_3550.axy"...
Field 1 did not solve (index index-tycho2-19.littleendian.fits, field objects 1-10).
Field 1 did not solve (index index-tycho2-18.littleendian.fits, field objects 1-10).
Field 1 did not solve (index index-tycho2-17.littleendian.fits, field objects 1-10).
  log-odds ratio 103.252 (6.94794e+44), 14 match, 0 conflict, 61 distractors, 18 index.
  RA,Dec = (84.8174,-4.7298), pixel scale 15.3409 arcsec/pix.
  Hit/miss:   Hit/miss: ---+-+++-+---+----+-+-----+++----+--------------------+-------------------+(best)-------------------------
Field 1: solved with index index-tycho2-16.littleendian.fits.
Field 1 solved: writing to file ./DSC_3550.solved to indicate this.
Field: DSC_3550.tif
Field center: (RA,Dec) = (84.816332, -4.733977) deg.
Field center: (RA H:M:S, Dec D:M:S) = (05:39:15.920, -04:44:02.318).
Field size: 8.52563 x 12.7615 degrees
Field rotation angle: up is -178.244 degrees E of N
Creating new FITS file "./DSC_3550.new"...
Creating index object overlay plot...
Creating annotation plot...
Your field contains:
  Part of the constellation Orion (Ori)
  The star 29Ori
  The star 27Ori
  The star ηOri
  The star 31Ori
  The star Mintaka (δOri)
  The star υOri
  The star 42Ori
  The star θ1Ori
  The star θ2Ori
  The star ιOri
  The star 45Ori
  The star Alnilam (εOri)
  The star σOri
  The star 49Ori
  The star Alnitak (ζOri)
  The star Alnitak (ζOri)
  The star 51Ori
  The star Saiph (κOri)
  The star 55Ori
 これによると、写真中央は赤経 05:39:15.920,赤緯 -4.733977°、画角は 8.52563° x 12.7615°、方位角は北から時計回り(東へ) -178.244°ということになる。ご丁寧にアノテーション付けて画像を作ってくれる。
10枚ほどでテストしてみる
999枚の画像をいきなり相手にすると、失敗した時に手戻りがしんどい。うまく行くかどうかわからない時は規模を小さくする。とりあえず10枚。
solve-fieldの結果はFITS形式のファイルに納められるんだが、これが良くない。良くないじゃない、分からない。perlモジュールでFITSのヘッダを読み込んで、つうことも出来たが、大袈裟すぎる。なので、標準出力に吐いてくる結果をファイルに取っておいて、vimのマクロでHuginの入力行にでっち上げた。こんな感じ。
# image lines
#-hugin  cropFactor=1.5
i w2006 h3009 f0 v8.51938 Ra0 Rb0 Rc0 Rd0 Re0 Eev-1 Er1 Eb1 r0 p-4.743981 y-74.425505 TrX0 TrY0 TrZ0 Tpy0 Tpp0 j0 a0 b0 c0 d0 e0 g0 t0 Va1 Vb0 Vc0 Vd0 Vx0 Vy0  Vm5 n"DSC_3051.tif"
#-hugin  cropFactor=1.5
i w2006 h3009 f0 v8.52187 Ra0 Rb0 Rc0 Rd0 Re0 Eev-1 Er1 Eb1 r0 p-4.742714 y-76.417419 TrX0 TrY0 TrZ0 Tpy0 Tpp0 j0 a0 b0 c0 d0 e0 g0 t0 Va1 Vb0 Vc0 Vd0 Vx0 Vy0  Vm5 n"DSC_3147.tif"
#-hugin  cropFactor=1.5
i w2006 h3009 f0 v8.52348 Ra0 Rb0 Rc0 Rd0 Re0 Eev-1 Er1 Eb1 r0 p-4.743526 y-78.415267 TrX0 TrY0 TrZ0 Tpy0 Tpp0 j0 a0 b0 c0 d0 e0 g0 t0 Va1 Vb0 Vc0 Vd0 Vx0 Vy0  Vm5 n"DSC_3243.tif"
#-hugin  cropFactor=1.5
i w2006 h3009 f0 v8.52714 Ra0 Rb0 Rc0 Rd0 Re0 Eev-1 Er1 Eb1 r0 p-4.742122 y-80.417011 TrX0 TrY0 TrZ0 Tpy0 Tpp0 j0 a0 b0 c0 d0 e0 g0 t0 Va1 Vb0 Vc0 Vd0 Vx0 Vy0  Vm5 n"DSC_3339.tif"

snip...
同一値となるはずのピッチ(あおり)がふらついてるのが気になるが、Huginで最適化せずにそのまま出力してみた。
一枚目が重ねあわせ前、二枚目がHuginの出力。揃っちゃあ居ませんね。原因はなんだろう。
- solve-fieldの結果を読み違えてるのか。視野中心の赤経赤緯が二度出力される。恐らく、恐らくだが、二度目の出力はWCSへマッピングするときの像の歪みのキャリブレーションが乗ってるのではないだろうか。だから歪んだのか、それとも、手前で像をキャリブレーションしないから歪んだのか、よく分からないが。
- 画像毎に得られた画角やピッチをそのまま使ったのが良くないのか。
とは言え、ご立派。solve-fieldさえあれば、アタマを使わずにここまで来れる訳だから。試しに、画角固定、ピッチ固定、ヨーは撮影時間間隔から算出でやってみる。


